In this post, I will address the meat of your LinkedIn profile, the experience section and skills & endorsements. Along the way, I will share examples and tips.
Reminder: Turn off the notifications when you edit these sections. Learn more here.
Entries of Experiences
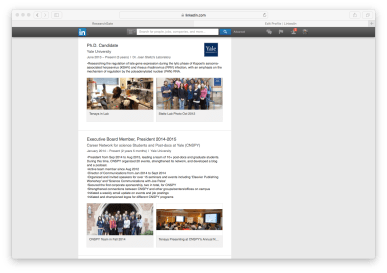
My first version of my LinkedIn profile consisted of information copied and pasted from my CV. This is a good first step. With each iteration of my LinkedIn profile, I find better strategies to convey information and will share these throughout this post. But the CV strategy is a good start. To make an entry, each experience must be added individually.
- At the top of the experience section, you will see a ‘+ position’ Click on this.
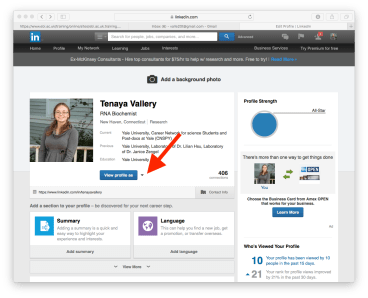
- Provide the job title, place of work, and time period. If possible, select the place of work as a group already on LinkedIn. Pictures and logos can convey information faster than the written word.
- Provide a description. List your key responsibilities and successes for each experience. I recommend using bullet points for ease of reading. You may also want to include numbers and statistics.
- “As a TA, I designed learning outcomes and prepared materials for discussion section. I held review sessions, co-wrote three exams, and graded and evaluated ~20 students.
- “During my presidency, CNSPY organized 20 events, and developed a blog and podcast. I raised over $2,500 for CNSPY events.”
For research and teaching experiences, I also provide a sentence or two on the research topics and a brief course synopsis. You should consider including conference information related to a particular research project.
- Researched very long abortive transcripts (VLATs) from coli RNA polymerase on a T5 N25 promoter variant with in vitro roadblock transcription.
- Presented a poster at the 2010 American Society of Biochemistry and Molecular Biology, Anaheim, CA (Poster 679.7)
Experiences to include
- Research experiences – summer internships, graduate work, undergraduate work, rotations. More on rotations – if the rotation led to a publication or a poster at a conference, then I would include it. You made a worthwhile contribution and should showcase it.
- Workshops or presentations you’ve given on a topic – this will demonstrate your expertise.
- TA-ing, tutoring, or teaching positions – this will reveal your life-long dedication to teaching if you are going for a teaching position.
- Leadership experiences – this is important for consulting and team-leading opportunities.
- Teamwork experiences – this is relevant for those going outside academia.
Remember: You need to review the wording to ensure clarity and brevity. Like your CV, it’s a work in progress.
Media in the Experience Section
“A picture is worth a thousand words.”
LinkedIn also provides the option of media uploads for each experience entry. I think this a fantastic tool. I commonly see photos, but you can also upload videos etc. I recommend two per experience entry and only high-resolution media.
What to provide? You want to use these media uploads to demonstrate your skill set. This is another marketing tool. For example:
- Teamwork and collaboration. I uploaded a lab photo and a group photo of CNSPY.
- Laboratory Experience. I put up a picture of me in lab.
- Communication Experience. A photo of me presenting in front of 100+ people.
Other examples include:
- A picture of you instructing a class.
- Education Outreach. Picture of you helping at a science fair.
- Writing Experience. Links to your blog or other projects you’ve worked on.
These photos and media uploads must enhance your experience entry and have a purpose. My goal is to convey skills through photos. On the first glance, recruiters may not take the time to read the details of my experiences. But the photos will draw their attention and subtly convey my messages.
Note: Provide simple captions.
Recommendations of Your Experiences
This is a relatively new, neat feature. Recommendations are statements made by co-workers, colleagues, clients etc, who are first-degree connections. These statements can be incredibly helpful and some say more valuable than endorsements, which I will discuss later.
The recommendations come in different flavors:
- Short with two sentences, or
- Long with a couple of paragraphs.
Regardless, the common element is specificity. Just like a letter of recommendation, the LinkedIn recommendation must be specific and provide insight into you as a professional!
Before you send a request:
- Choose the recommenders wisely. You can only have three recommendations per experience entry.
- Talk about the recommendation first with your recommender. Let your recommender know which skills and key words you want to be conveyed on your profile.
How to request a LinkedIn recommendation:
- Go to your profile and click the down arrow to the right of the button near your profile picture.
- Click Ask to be recommended from the dropdown.
- Choose one of your positions (The related experience must be present on your LinkedIn profile first.).
- Name your recommenders. You can have up to three for each experience entry.
- Click Send. You can ask your connections to write a recommendation of your work that you can display on your profile.
Tips:
- Put some time between recommendations. Stagger them out. Plan ahead so that they do not all appear just before you go on the job market.
- If you are writing one, I stick to short and sweet. Be direct and avoid vague statements. Provide concrete examples.
Note: 3,000 character limit.
Skills & Endorsements
The skills & endorsement section is a quick survey of your skills. In this section, first-degree connections confirm your strengths with one click. It is similar to liking a post or photo on Facebook. Recruiters can skim the list and see if your particular set of skills match the position that they are trying to fill. Search filters will also pick up these endorsements.
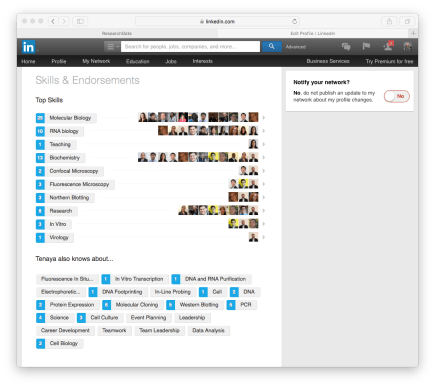
At the same time, you can build your professional identity through this section. First you can list your skills. Second, you can delete endorsements. This might be helpful if you are trying to demonstrate expertise in complex procedures or if you are trying to move away from the bench. This section, like other features of the LinkedIn profile, help you market yourself as unique and valuable.
Added Bonus. This is a great way to interact with your network. You can endorse others. In general, if you endorse someone, they will endorse you back.
Tips:
- As scientists, we tend to promote our technical skills. Do not forget to include softer skills like ‘science communications’ and ‘grant writing.’
- If you want a particular trait to stand out, say ‘teamworking,’ ask a few friends to endorse you. There is no harm in this. For example, I endorsed ‘leadership’ and ‘teamwork’ for a fellow CNSPY board member, who was applying for a consulting position.
Two caveats:
- LinkedIn will make suggestions of possible skills to your connections to endorse. For example, I routinely get endorsed for PCR, but I did not list this skill in my profile. Again you can delete these endorsements.
- From my own profile, I know that some of my connections endorsed me for skills that were not a part of our interaction. For example, how would my fellow CNSPY board member know that I do PCR well? I know this and recruiters will too. This is why recommendations might be a better way to convey your skills. At the same time, I do love the ability to quickly evaluate someone’s skills. In conclusion, there are positives and negatives with the endorsement section.
Publications.
You can also add publications to your LinkedIn profile! I highly recommend this. For scientists, publications are our bread and butter. They demonstrate our skill sets in peer-review manner and reveal how we think, our skills at logic and the scientific method.
In a publication entry, you are able to list the authors in the same order as on the publication and provide a link to the paper. When you do this extra step, you help out your network. The publication will appear on the profiles of the other authors.

If one of the authors is not on LinkedIn, fear not. You can just add their name.
The publication section is another great way to showcase your success as a science professional.
In closing, the experience section on your LinkedIn profile is a great marketing tool. It has many special features that allow you to go beyond the written word with media and endorsements.

Leave a comment